Configure Sites
For most administrators the sites are the physical locations or offices. However, the sites in Active Directory are the network segments of an organization’s network that are located at different geographical locations and are connected using high-bandwidth.
The sites are actually created to physically group the network resources in such as way that the network traffic is optimized and the limited available bandwidth is used efficiently. The domain controllers are placed in sites as server objects. The sites help in easy and fast authentication because they can locate the nearest domain controller. Besides, they allow replication of resources between the Active Directory sites.
Before configuring sites, it is important to plan the design of the site topology because a carefully designed site topology can ensure reduced network traffic, smooth network operations, and a low Active Directory replication cost, and quick location of resources.
The planning for Active Directory site topology include following considerations:
- If there are two or more TCP/IP segments that operate at 10 Mbps or faster speed then they should be configured on the same LAN on the same site.
- If the branch office is growing rapidly and the users require external resources quite often then a separate site for a branch office should be created.
- A part of the network is separated by a slow link then a new site should be created.
- You want to control replication between two domain controllers then a new site should be created.
- You want to control service localization then a new site should be created.
Rename a site
When you configure your first domain controller, it automatically creates a default site called Default-First-Site-Name and places the domain controller under it. You can rename this site according to your business or network topology and also create new sites as per your requirements. All the subsequent domain controllers added to the Active Directory are placed under the appropriate sites according to their IP addresses.
To rename the default site, you need to:
- Open Active Directory Sites and Services snap-in by clicking Start- >Administrative Tools-> Active Directory Sites and Services.
- Right-click the Default-First-Site-Name node under the Sites node and then select Rename, as shown in Figure 3-13:
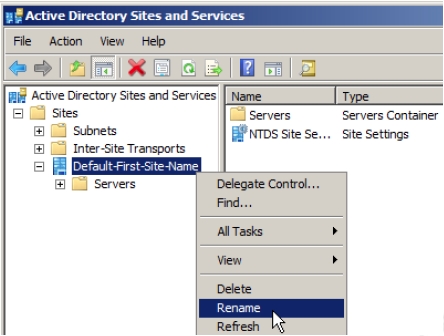
Figure 3-14 - Type the name of the site on the Default-First-Site-Name node.
- Right-click the Subnets node and select New Subnet to add a subnet to the site, as shown in Figure 3-15.To configure sites, you need to create a site object and then associate a subnet object with it. A site can have more than one subnet but a subnet can belong to only one site. A subnet object defines a range of IP addresses.
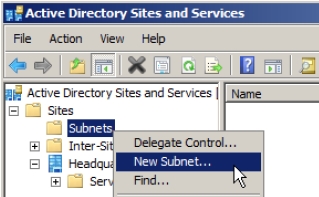
Figure 3-15 The New Object dialog box appears, as shown in Figure 3-16.
The sites are useful only when the clients and servers know the site to which they belong to. It is therefore important to associate the system’s IP addresses with the site so that subnet objects receive this association. A range of IP addresses can be associated with the subnet by providing the subnet with the address/prefix notation.
- Enter the subnet as 10.0.0.0/24 for this example to include IP addresses from 10.1.1.1 to 10.1.1.254.
- Select the site name to which you want to attach this subnet to from the Select a site object for this prefix field and click OK.
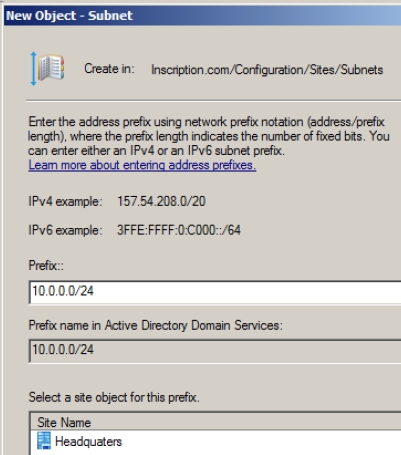
Figure 3-17
Add a new Site
To manage the replication traffic and to localize the services, you may need to add more sites. To add more sites, you need to:
- Open Active Directory Sites and Services snap-in by clicking Start- >Administrative Tools-> Active Directory Sites and Services.
- Right-click the Sites node and then select New->Site from the menu that appears, as shown in Figure 3-18.

Figure 3-18 The New Object — Site dialog box appears, as shown in Figure 3-19.
- Provide the name of the site in the Name field.
- Select the site link object for the site from the list given on the dialog box and then click OK.
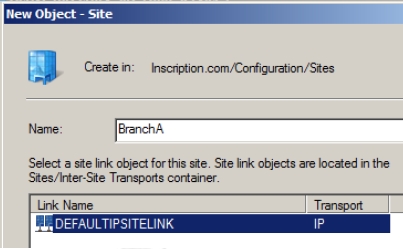
Figure 3-19 The new site is created. You can now add a subnet object to the site by following the steps 4-6 from the rename procedure of the default site, given above.