The most important task that network administrators need to perform is the management of Active Directory users, computers, and groups. A properly configured system ensures that only properly authenticated users and computers can logon to the network and access the resource. Windows Server 2008 provides many tools such as Server Manager and Active Directory Users and Computers to manage AD accounts.
The Active Directory Users and Computers snap-in allows you to create, modify, and delete AD objects which are nested inside Organizational Units. The Active Directory should be designed considering the security in mind. You may have separate OUs for each department that has different policies or different department with same kind of policies can be a part of just one OU.
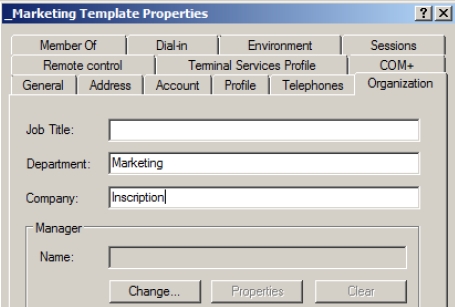
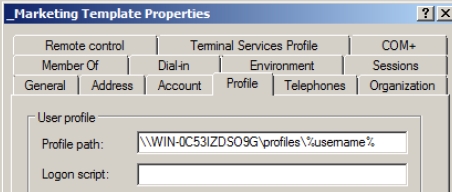
AD objects in Server 2008 have meaningful names and include a Description column that tells you what each default object does. Each object is made up of a group of properties, which describe the object and what it can do. The properties windows of the object can be viewed by right-clicking the object and selecting Properties from the menu that appears. The most important objects of AD are Computers, Users and Groups.
The Computer object allows you to find out the computers on the network and the rights that each computer has on the network. It contains domain controllers, member servers, and workstations. However, the domain controllers are found in the Domain Controllers container. Member servers and workstations appear in the Computers container. Properties window of a computer object allows you to manage the computer object. The User object describes about the users of your organization. The properties window of each user allows you to configure the properties of the user.
There are different types of group objects in the Active Directory. For example, the security distribution group, which allows you to manage access rights for multiple users all at once. The other kind of group is the distribution group that is used solely for email distribution. Most of the maintenance tasks are performed with Active Directory Users and Computers. Some of the common tasks that you can perform with Active Directory Users and Computers include:
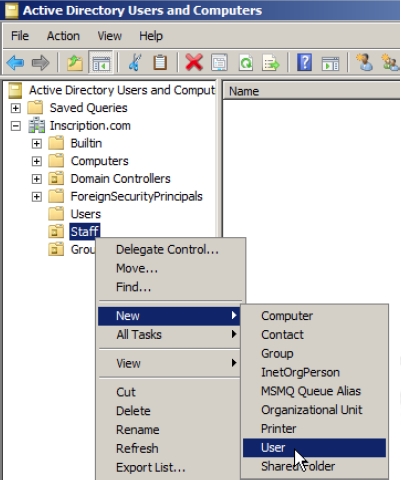
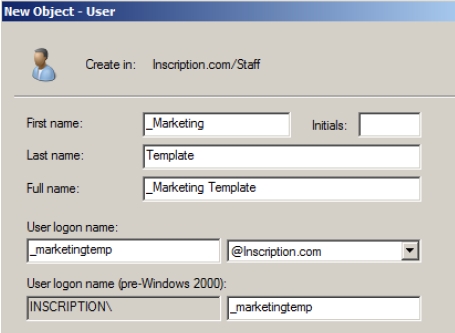
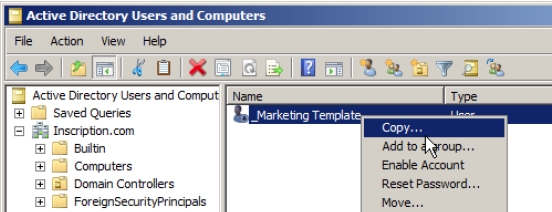
- Create a new user: To create a new user, you need to right-click the OU or the container, where you want to add the new user and then click New-> User to start the New Object – User wizard that guides you through the process of creating the new user. Follow the prompts in the screen and provide the information asked.
- Create a new group: To create a new user, you need to right-click the OU or the container, where you want to add the new group and then click New-> Group to start the New Object – Group wizard that guides you through the process of creating the new group. Follow the prompts in the screen and provide the information asked. For most common needs, the Global Security group is created.
- Create an OU: To create a new OU, you need to right-click the OU or the container, where you want to add the new OU and then click New-> Organization Unit to start the New Object – Organization Unit wizard that guides you through the process of creating the new group. Follow the prompts in the screen and provide the information asked.
- Add user to a group: To add user to a group, you need to right-click the user object and then select Add to a group. In the Select Groups window, type the name of the group in the Enter the Object Name to select field and click Check Names, as shown in Figure 5-7. Alternatively, if you don’t know the group name, then click Advanced and then click Find Now to display all groups. From the list of groups, select the group you want the user to belong to and click OK. Click OK again to close the Select Group window and finish.
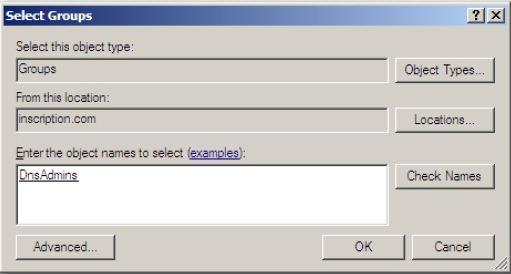
Figure 5-7 - Change a password: To change the password, you need to right-click the user object and then select Reset Password. In the Reset Password window, type the new password in the appropriate fields and then select Users Must Change Password check box to force a user to change a password immediately. Click OK.
- Unlock a user account: To unlock a user, you need to right-click the user object and then select Properties. In the Account tab of the Properties window, deselect the option Account is locked out.
- Disable/Enable a user account: To disable a user account, you need to rightclick the user object and then select Disable Account. You can re-enable the account by right-clicking the user object and selecting Enable Account.
- Move a user: To move a user from one container to another, you need to drag and drop the user to the target container.
- Restrict logon times: To restrict the logon hours of a user, you need to right-click the user object and then select Properties. In the Properties windows click the Account tab and then click Logon hours. In the Logon Hours window, select Logon Denied and click the time blocks when you don’t want the user to log on.
- Delete a group: To delete a group, right-click the group object and then select Delete from the menu that appears.
- Delegate authority: To delegate the authority, you need to right-click the container object where you want to delegate tasks. Select Delegate Control. Follow the The Delegation of Control Wizard prompts on screen to add users or groups that you want to give control to and what powers you want to grant to those users or groups.
- Allow users to use VPN: To allow users to use VPN, you need to right-click the user object and then select Properties. In the Properties windows click the Dialin tab. Select Allow Access. Alternatively, if you have implemented Windows Server 2008’s Network Access Protection, then click Control access through NPS Network Policy. Click OK to close.
- Edit object attribute: To edit the attributes of an object right-click the object and then select Properties. In the Properties window click the Attribute Editor tab. Select the attribute that you want to modify. Click the Edit button. Make your change and click OK.