Manage Enrollments
Once you are ready with your certificates, you must manage the enrollment of certificates. The enrollment allows the users to request, retrieve, renew, and update the certificates. The Autoenrollment feature of AD CS allows the certificates to be distributed without the client even being aware of the enrollment.
To properly configure autoenrollment of certificates, you need to plan the appropriate certificate template and the settings in the certificate template directly affect the behavior of certificate autoenrollment. You can implement autoenrollment, through GPO.
To configure autoenrollment Group Policy for a domain, you need to:
- Click Start->Settings->Control Panel-> Administrative Tools-> Group Policy Management. The GPMC appears.
- Right-click the Default Domain Policy GPO for the domain in which you want to configure autoenrollment and then click Edit. The Group Policy Management Editor appears, as shown in Figure.
- Expand Computer Configuration->Windows Settings-> Security Settings and click Public Key Policies to assign autoenrollment to computers.
- Double-click Certificate Services Client->Auto-Enrollment on the details pane, as shown in Figure 7-12:
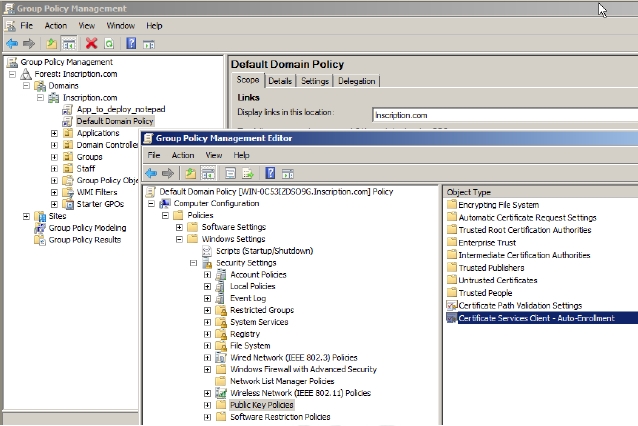
Figure 7-12 The Certificate Services Client->Auto-Enrollment Properties window appears, as shown in Figure 7-13
- Select Enabled from the Configuration Model dropdown.
- Select Renew expired certificates, update pending certificates, and remove revoked certificates checkboxes to enable autoenrollment for certificate renewal, issuance of pending certificate requests, and the automatic removal of revoked certificates from a computer’s certificate store respectively.
- Select Update certificates that use certificate templates checkbox if you have already issued some certificates manually.
- Click OK and then close GPME and GPMC.
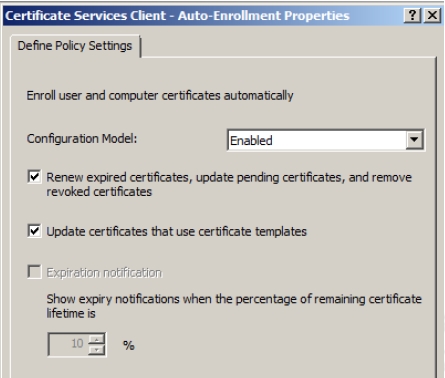
Figure 7-13 This will configure autoenrollment for computers. You can follow the same procedure to configure autoenrollment for users. The only difference will be to go to User Configuration node instead of Computer Configuration node in the GPME console.
- Open the Server Manager-> Roles->Active Directory Certificate Services
- Right-click the <Issuing CA server name> and then select Properties from the menu that appears, as shown in Figure 7-14:
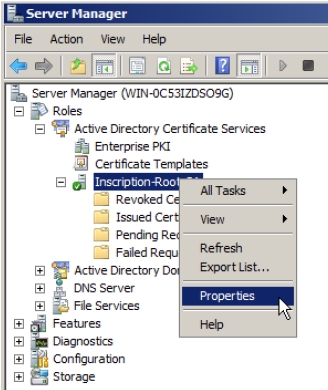
Figure 7-14 The Properties window of the issuing CA server appears, as shown in Figure 7-15.
- Click Policy Module tab and then click Properties.
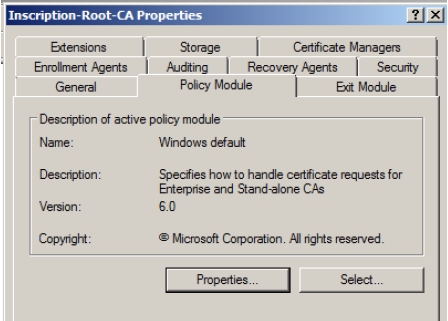
Figure 7-15 - Select Follow the settings in the Certificate template, if applicable. Otherwise, automatically issue the certificate option and then click OK, as shown in Figure 7-16:
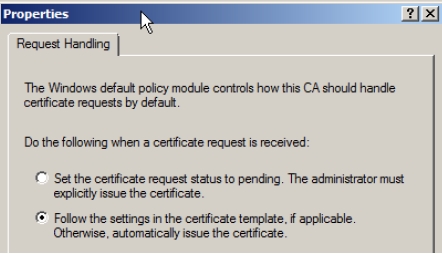
Figure 7-16 - Click OK again.
Your Issuing CA is now ready to use and will issue the certificates automatically when they are requested by the devices or by the users of the domain.