Configure Active Directory Federation Services (AD FS)
The AD FS is usually deployed in medium to large organizations that use multiple domains and have computers that run various operating systems. AD FS allows you to create a highly secure, extensible and Internet-scalable solution that can operate across both Windows and non-Windows multiple platforms.
AD FS can be installed if the domain runs either AD DS or AD LDS. It is tightly integrated with Microsoft Office SharePoint Server 2007 and AD RMS. AD FS is integrated with AD RMS in such a way that organizations can collaborate with external partners using the existing federated trust relationship.
To install the Federation Service, you need to:
- Click Start-> Administrative Tools->Server Manager-> Roles Summary-> Add Roles
- Click Next on the first page of the Add Roles Wizard that appears.
- Click Active Directory Federation Services option on the Select Server Roles page, as shown in Figure 4-32:
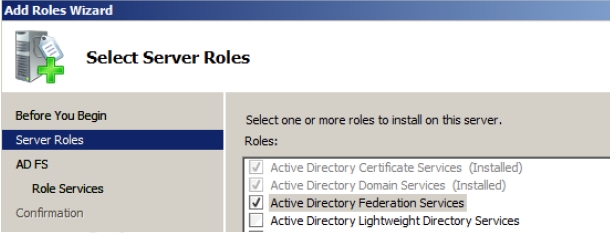
Figure 4-32 - Select the Federation Service check box on the Select Role Services page and then click Add Required Role Services if the additional Web Server (IIS) or Windows Process Activation Service role services are not installed already, as shown in Figure 4-33.
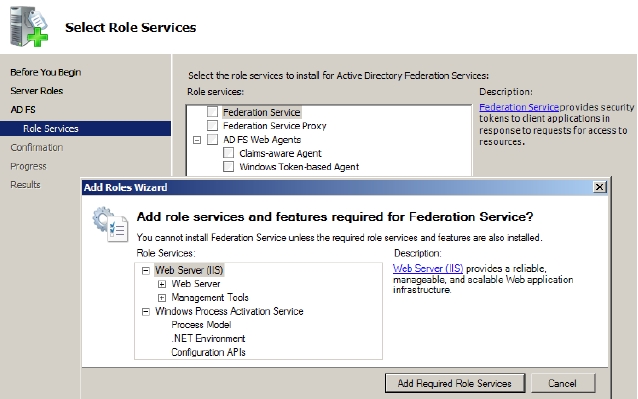
Figure 4-33 - Select the certificate displayed on the Choose a Server Authentication Certificate for SSL Encryption page that appears and then click Next, as shown in Figure 4-34 .
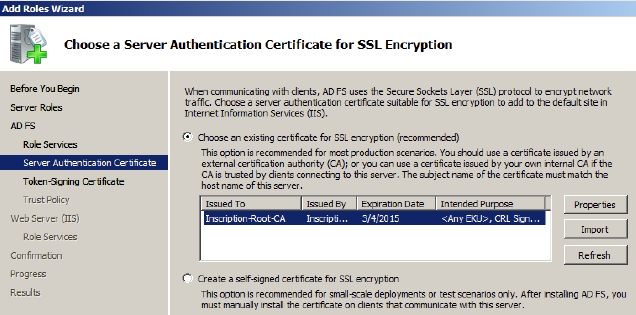
Figure 4-34 - Click Create a self-signed certificate for SSL encryption option and then click Next. The Choose a Token-Signing Certificate page appears.
- Click Create a self-signed token-signing certificate option and then click Next, as shown in Figure 4-35:
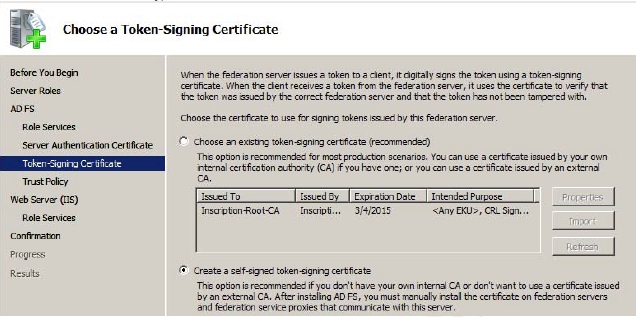
Figure 4-35 The Select Trust Policy page appears, as show in Figure 4-36.
- Click Create a new trust policy and then click Next twice.
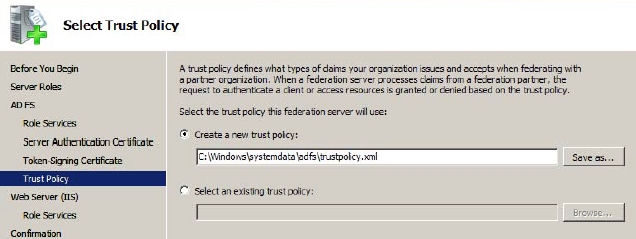
Figure 4-36 The Select Role Services page appears, as shown in Figure 4-37.
- Accept the default values and then click Next. The Confirm Installation Selections page appears.
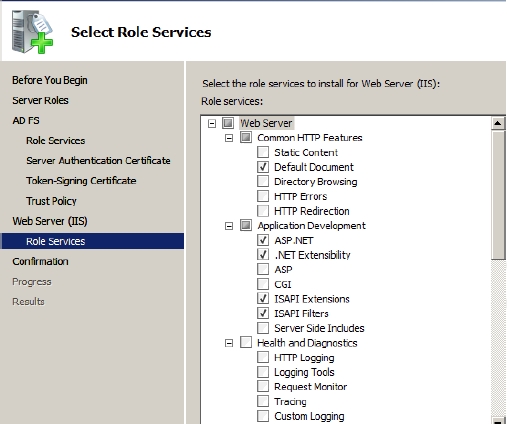
Figure 4-37 - Click Install. The Installation Results page appears.
- Verify the installation and then click Close.