Although, the Reverse Lookup Zone is not mandatory to configure, it is a good practice to configure it. To configure the Reverse Lookup Zone, you need to:
-
- Right-click the Reverse Lookup Zones node under the DNS server in the DNS Manager console and then click New Zone, as shown in Figure 2-7.
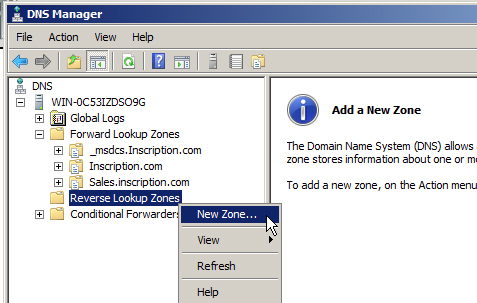
Figure 2-7 - Click Next on the first page of the New Zone Wizard that appears.
- Select the type of zone you want to create from the Zone Type page. Select Primary zone for this example because this is the first zone and cannot be secondary.
- Ensure that Store the zone in Active Directory option is turned on and then click Next, as shown in Figure 2-8:
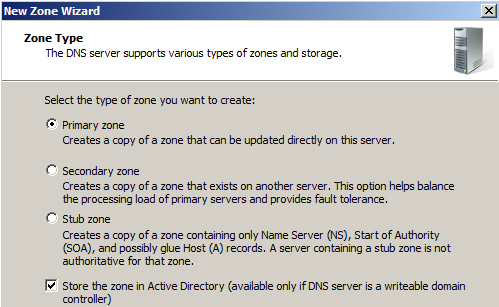
Figure 2-8 The Active Directory Zone Replication Scope page appears, as shown in Figure 2-9. The page allows you to specify the replication scope of the zone.
- Select To all DNS servers in this domain option because this zone is tied to the specific domain inscription.com.
- Click Next.
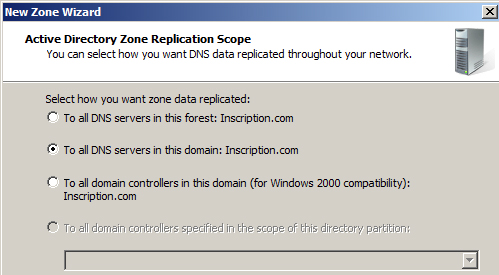
Figure 2-9 The Reverse Lookup Zone Name page appears, as shown in Figure 2-10.
- Select the address type as IPv4 Reverse Lookup Zone for the zone for this example because we are using IPv4 addresses. If you are using both IPv4 and IPv6 IP addresses then you need to create two reverse lookup zones.
- Click Next.
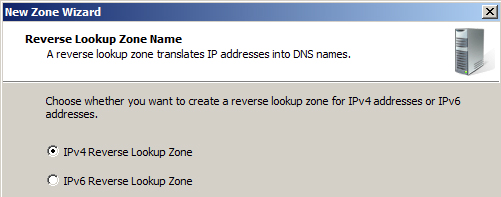
Figure 2-10 - Type the Network ID of the zone or the IP address range for which the reverse lookup zone is responsible in the next page that appears.The wizard automatically generates the Reverse lookup zone name by reversing the order of the digit blocks and appending the result to the “root” domain name, as shown in Figure 2-11:
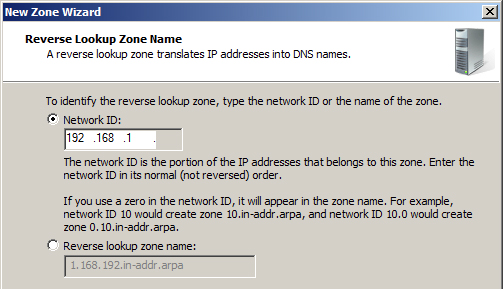
Figure 2-11 - Select the type of dynamic update that you want to allow for the zone from the Dynamic Update page that appears, as shown in Figure 2-12. For this example ensure that the most commonly used option Allow only secure dynamic updates is selected.
- Click Next.
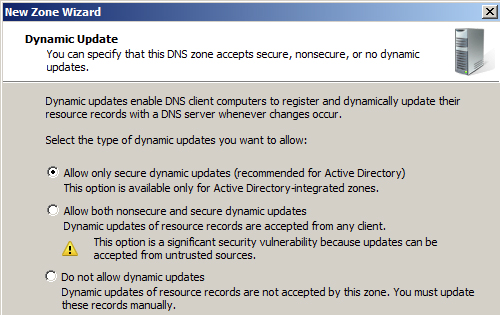
Figure 2-12 - Click Finish on the last page of the Wizard.
- Right-click the Reverse Lookup Zones node under the DNS server in the DNS Manager console and then click New Zone, as shown in Figure 2-7.
The Reverse lookup zone is created.