Install DNS Server Role
You can install DNS role separately or install the DNS server at the time of installing AD DS. To install DNS server role separately on your Windows Server 2008, you need to:
- Log on to the server with local Administrator account.
- Click Add roles under Customize This Server in the Customize Your Server window, if it opens automatically, as shown in Figure 2-1:
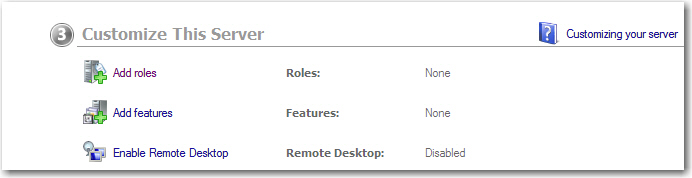
Figure 2-1 Alternatively, you can click Start->Settings->Control Panel->Administrative Tools->Server Manager and then right-click the Roles node and select Add Roles. The Add Roles Wizard appears.
- Verify the requirements to add roles on the server and click Next. The Select Server Roles page appears, as shown in Figure 2-2.
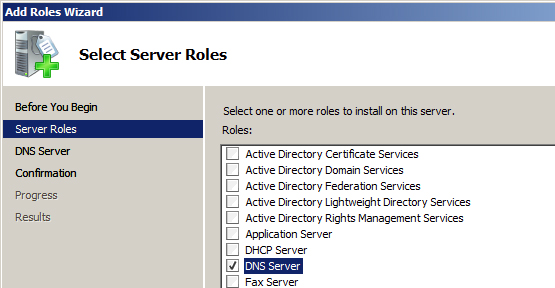
Figure 2-2 - Select DNS Server option from the Roles field and click Next.The DNS Server page appears. The page provides you all of the information about DNS that you may need to know before installing and using this service.
- Click Next. The Confirm Installation Selection page appears.
- Click Install. The Installation Progress page appears.After the installation is complete, the Installation Results page appears, as shown in Figure 2-3:
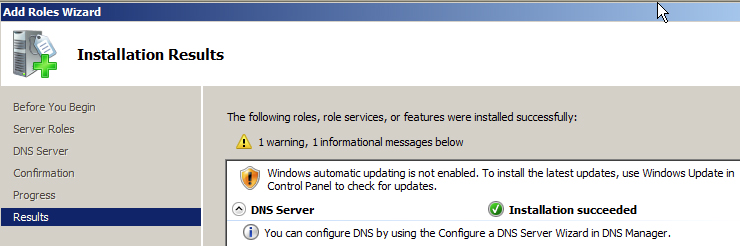
Figure 2-3 The page displays the warning if you have not completed the requirements mentioned on the first page of the wizard that includes enabling Automatic Updates else the page displays successful installation message without any warnings.
- Click Close. The DNS role appears in Server Manager under Roles node, as shown in Figure 2-4.
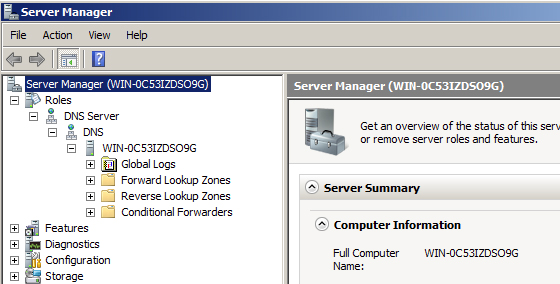
Figure 2-4 The DNS role creates the containers such as Forward Lookup Zones, Reverse LookupZones, and Conditional Forwarders that are required to run DNS service on the server.