As mentioned earlier, RODC does not store user credentials on it by default. However, you can configure it to cache the user credentials. You can also configure RODC to disallow users’ credentials from caching on an RODC.
Configuring an RODC-Specific Password Replication Policy to cache the credentials
of Users and computers
To proceed with the configuration of Password Replication Policy to cache the
credentials of Users and computers, you should:
- Create Users: Jack Hay, Ed Young and Sam Jones on the domain controller.
- Create a group called Branch office users on the domain controller
- Add Jack Hay to the Branch Office Users group, as shown in Figure 4-16:
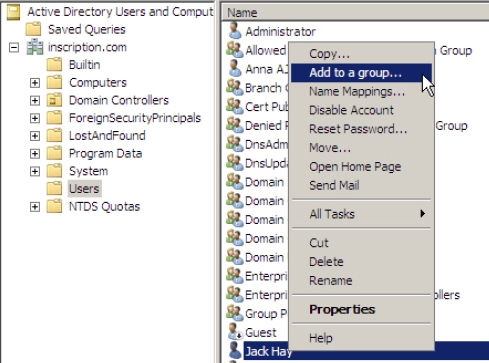
Figure 4-16 - Add the DNSAdmins group to the Denied RODC password replication group,
as shown in Figure 4-17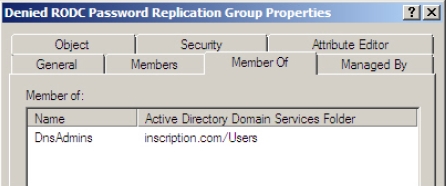
Figure 4-17 - Add Branch Office Users group in the Allowed RODC Password Replication
groupThe Denied RODC password replication group and Allowed RODC Password
Replication group are the two domain local security groups in Windows Server 2008
User’s container of AD DS that helps in configuring Password Replication Policy.The Allowed RODC Password Replication group does not contain any members by
default because RODC does not cache any credentials by default. However, you can add
members to this group to allow caching of credentials on RODC.The Denied RODC password replication group should be configured with users or
groups whose credentials you want to ensure that RODC should never cache. By default
this group contains security sensitive accounts that are members of groups such as
Domain Admins, Enterprise Admins, and Group Policy Creator Owners.After performing the above given tasks, you need to configure the password replication
policy so that the credentials of users logging of the Allowed RODC Password
Replication group can automatically be replicated to the RODC so that they can log in
through the RODC also.
Configuring Password Replication Policy
To configure the password replication policy, you need to:
- Select Domain Controllers node under the domain name to view the domain
controllers running in the domain, as shown in Figure 4-18.
Figure 4-18 - Right-click the Read Only domain controller from the left panel and then select
Properties from the menu that appears, as shown in Figure 4-19.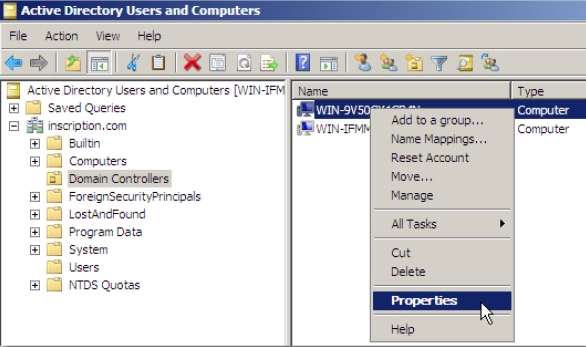
Figure 4-19 The Properties window of the RODC appears, as shown in Figure 4-20.
- Click Password Replication Policy tab.The tab displays the list of accounts that that are defined in the Allowed List and the
Denied List on the RODC by default. We now need to add Branch office Users group to
the allowed list so that when the users of this group log on to RODC, their credentials are
cached. - Click Add.
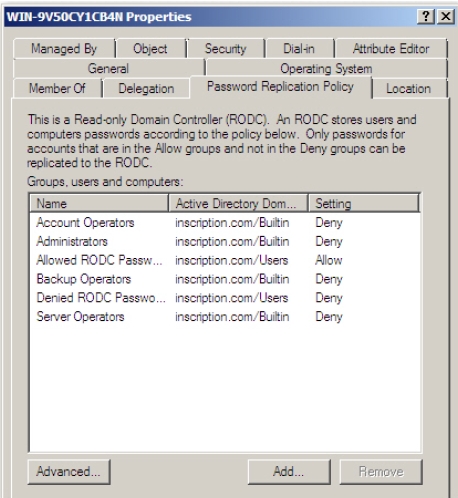
Figure 4-20 The Add Groups, Users and Computers window appears, as shown in Figure 4-21.
- Select Allow passwords for the account to replicate to this RODC option and
click OK.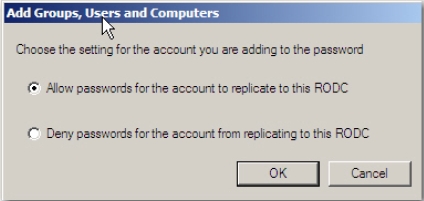
Figure 4-21 - Provide Branch Office Users group name in the Select Users, Computers, or
Groups window that appears and click OK, as shown in Figure 4-22.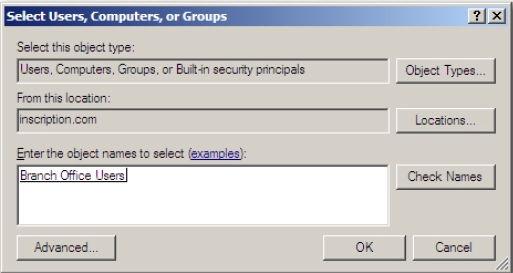
Figure 4-22 The credential caching through password replication policy is successfully configured on
the RODC. You need to now monitor credential caching to verify that RODC is caching
the credentials.
Monitor Credential Caching
By default, the RODC caches only the credentials of the krbtgt account and the computer
account of the RODC itself. To monitor RODC for credential caching, you need to:
- Log on to the RODC with Jack Hay account (The member of Branch Office Users
account) and then Log out. - Log on to the RODC with Ed Young account (User on domain controller but not a
member of Branch Office Users group) and then Log out.You can now check whether the credentials of Branch Office User are cached on the
RODC or not. - Log on to the Domain controller
- Click Start-> Settings->Control Panel->Administrative Tools-> Active
Directory Users and Computers. - Select Domain Controllers node under the domain name and then right-click the
Read Only domain controller from the left panel - Select Properties from the menu that appears
- Click Password Replication Policy tab in the Properties window
- Click Advanced.The Advanced Password Replication Policy for the RODC window appears, as shown
in Figure 14. - Click Accounts whose passwords are stored on this Read-only Domain
Controller option in the Display users and computers that meet the following
criteria drop-down list. - Verify that the Jack Hay account appears in the list but not the account of Ed
Young. This is because Jack Hay is the member of Branch Office Users group,
which is the group that is configured on RODC for the caching of credentials. The
credentials of Ed Young are not cached because this user is not the member of
Branch Office Users group, as shown in Figure 4-23.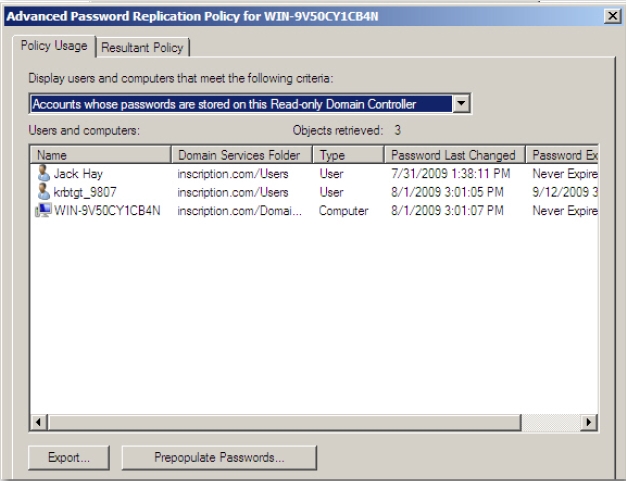
Figure 4-23 - Click Accounts that have been authenticated to this Read-only Domain
Controller option in the Display users and computers that meet the following
criteria drop-down list, as shown in Figure 4-24.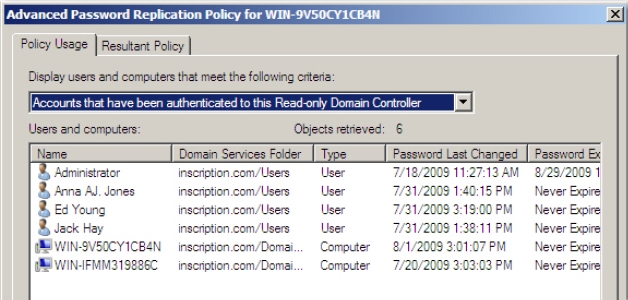
Figure 4-24 - Verify that the account entries for both Jack Hay and Ed Young appear in the list.
This is because; this list displays the list of accounts that have been authenticated
by the RODC and not the accounts that have been cached.
Prepopulate the password cache for the RODC
The Prepopulating of password cache on the RODC allows you to configure RODC to
cache account credential for user accounts that must be cached but the users have not yet
logged on to the RODC. Prepopulating of password cache on the RODC ensures that the
user is allowed to log in to the network in the branch office, even when the WAN link is
failed between the main office and the branch office.
You can prepopulate the cache only for accounts that are configured to be cached in the
Password Replication Policy.
To prepopulate the password cache for an RODC, you need to:
- Log on to the Domain controller
- Click Start-> Settings->Control Panel->Administrative Tools-> Active
Directory Users and Computers. - Select Domain Controllers node under the domain name and then right-click the
Read Only domain controller from the left panel - Select Properties from the menu that appears
- Click Password Replication Policy tab in the Properties window
- Click Advanced.The Advanced Password Replication Policy for the RODC window appears.
- Click Prepopulate PasswordsThe Select User and Computers window appears, as shown in Figure 4-25.
- Type or browse the name of the user whose credentials you want to prepopulate in
the cache for the RODC in the Enter the object names to select field, and click
OK.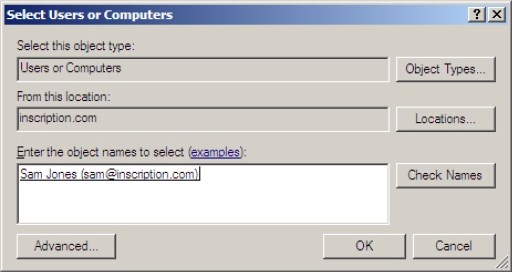
Figure 4-25 The Prepopulate Passwords window appears displaying the name of the selected user,
as shown in Figure 4-26. - Click Yes.
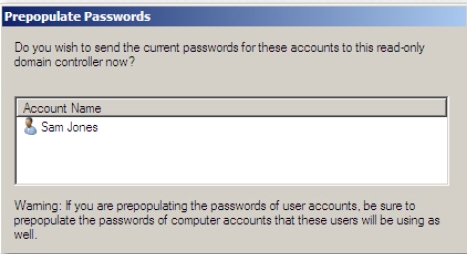
Figure 4-26 The Prepopulate Passwords window starts displaying the progress of the task, as shown
in Figure 4-27.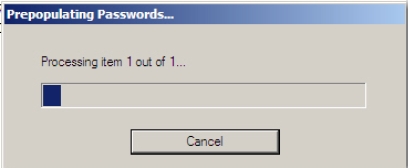
Figure 4-27 The Prepopulate Password Success window appears
- Click OK.
- Click Accounts whose passwords are stored on this Read-only Domain
Controller option in the Display users and computers that meet the following
criteria drop-down list, as shown in Figure 4-28: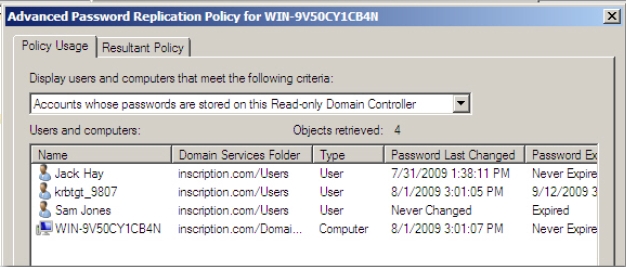
Figure 4-28 Verify that the list shows account for Sam Jones, whose credentials have been
prepopulated on the RODC.