Configure Active Directory Lightweight Directory Service (AD LDS)
Creating an AD LDS instance
To create an AD LDS instance, you need to:
- Install AD LDS on your server, using Add Roles Wizard through Server Manager.You can now start using AD LDS service by creating an AD LDS instance for the desired application. To create an AD LDS instance, you need to:
- Click Start->Settings->Control Panel->Administrative Tools
- Select Active Directory Lightweight Directory Services Setup Wizard tool, as shown in Figure 4-1.
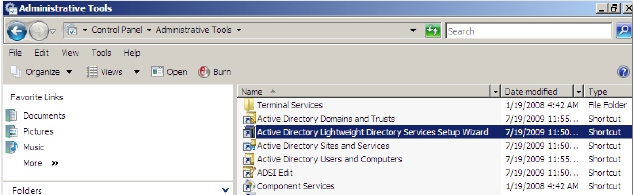
Figure 4-1 - Click Next on the Active Directory Lightweight Directory Services Setup Wizard that appears.The Setup Option page of the wizard appears, as shown in Figure 4-2. The page provides you option to create A unique instance or A replica of an existing instance.
- Select A unique instance option and click Next. Select the mentioned option because you are creating your first AD LDS instance in this example.
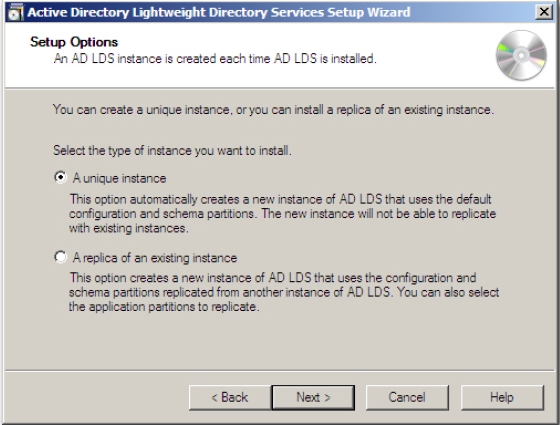
Figure 4-2 The Instance Name page appears, as shown in Figure 4-3.
- Provide a meaningful instance name in the Instance name field and click Next.A meaningful instance name allows you to identify an instance that is tied to an application on the local computer. It also allows you to identify the associated files and the service that supports the instance.
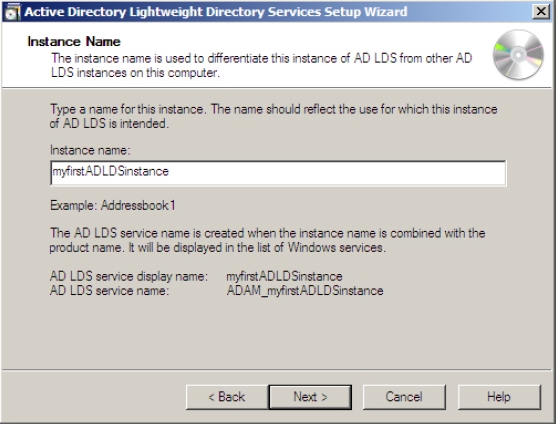
Figure 4-3 The page displays the first available communication ports that AD LDS instance would use for communication on this computer. Usually port 389 is provided by default in LDAP port number field and port 636 is provided in SSL port number field. These ports are the default ports for AD DS service also.
Because both these services use the same ports, Microsoft recommends using different server computers for both these services. However, there is no such restriction. If you want to use both the services on the same computer, you need to specify different ports for both these services.
If the wizard detects that AD DS is already installed on server and ports 389 and 636 are already in use, it proposes first available communication ports starting from 50000. It therefore proposes 50000 and 50001 ports for LDAP port number and SSL port number fields respectively.
- Modify the default port numbers to 50000 and 50001 ports for LDAP port number and SSL port number fields respectively if AD DS is not already installed on server but you decide to install it in future else keep the default ports.
- Click Next.
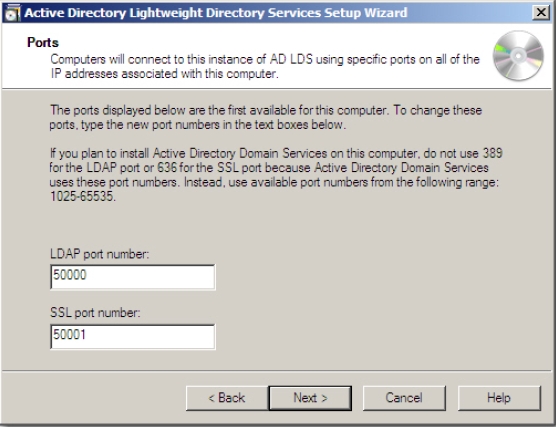
Figure 4-4 The Application Directory Partition page appears, as shown in Figure 4-5.
The application Directory partitions store Domain Name System (DNS) zones in a data structure in such a way that the data of the different zones can be distinguished for different replication purposes. The application directory partitions are created to control the scope of replication for the zone that is stored in that partition.
The page allows you to specify the name of Active Directory application partition name that you want to use for this instance. You can choose to create a new application partition or decide to proceed without creating a partition. If you decide to proceed without creating a partition you need to manually create a partition after the creation of AD LDS instance. You can use AD LDS administration tools later to create an application directory partition or create an application partition at the time of installing your directory-enabled application and tying it to an AD LDS instance.
You must specify a unique distinguished name for the partition in the following format:
CN=,DC=
The partition name is based on the fully qualified domain name. For example, if the instance name is myfirstADDLSinstance and the server name is Inscription.com, then the partition name would be represented as:CN= myfirstADDLSinstance,DC=Inscription,DC=com
- Specify a unique distinguished name for the partition in the Partition name field and click Next.
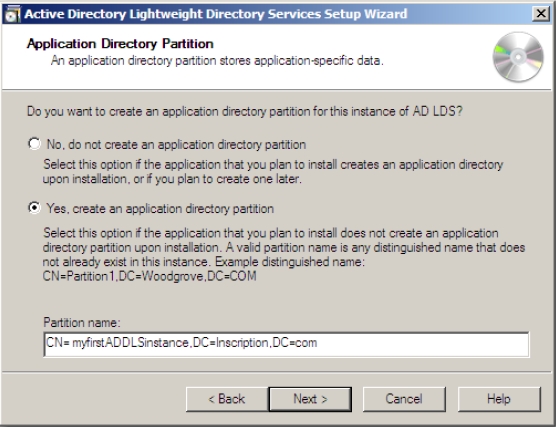
Figure 4-5 The File Locations page appears, as shown in Figure 4-6.
The page allows you to specify the locations of files associated with this AD LDS instance.
- Provide a file location by typing or browsing the location for associated data files in Data files field and for data recovery files in Data recovery files fields respectively and click Next.
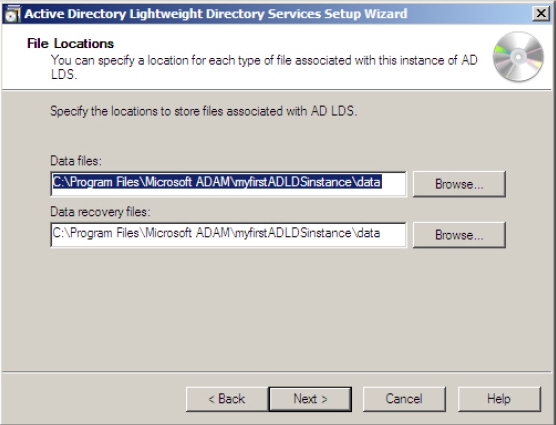
Figure 4-6 The Service Account Selection page appears, as shown in Figure 4-7.
The page allows you to select a service account that will be used to run this AD LDS instance according to the permissions associated with the selected account. You can use Network service account option if you have to manage just one AD LDS instance. However, if you have many AD LDS instances then it is better to use service account or This account option for each instance
- Select the desired account. Provide the credentials of the service account in the User name and Password fields if you choose This account option.
- Click Next. The AD LDS Administrators page appears, as shown in Figure.The page allows you to select user account that will administer this AD LDS instance. It is always better to select a group on this page so that a group would have the rights to administer the AD LDS instance. This is because if the personnel change, in a group, members can be added or changed but an individual account is difficult to change.
- Select Currently logged on user option if you want the current user to administer the instance. Alternatively, select This account option and Browse the individual account or a group account that you want to use to manage this AD LDS instance.
- Click Next.
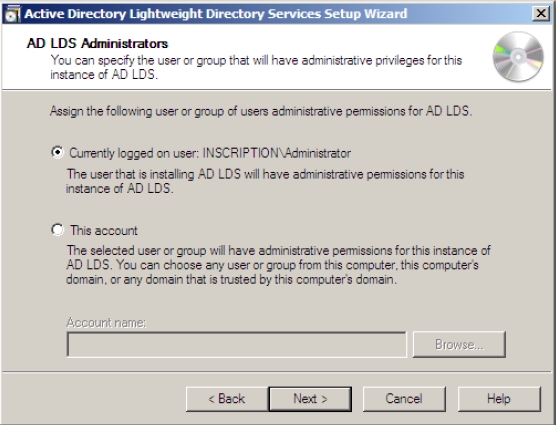
Figure 4-7 The Importing LDIF Files page appears, as shown in Figure 4-8.
The LDIF files extend the schema of the AD LDS instance. By default the seven LDIF
files are available. These files are:- MS-AdamSyncMetadata.ldf: Required to synchronize data between an AD DS forest and an AD LDS instance through ADAMsync.
- MS-ADLDS-DisplaySpecifiers.ldf: Required for Active Directory Sites and Services snap-in operation.
- MS-AZMan.ldf: Required to support Windows Authorization Manager.
- MS-InetOrgPerson.ldf: Required to create inetOrgPerson user classes and attributes.
- MS-User.ldf: Required to create user classes and attributes.
- MS-UserProxy.ldf: Required to create a simple userProxy class.
- MS-UserProxyFull.ldf: Required to create a full userProxy class.
Besides these seven LDF files, the following LDF files are also available:
-
- MSadamschewmaw2k3.ldf: required to synchronize an AD LDS instance with AD DS in Windows Server 2003.
- MSadamschewmaw2k8.ldf: required to synchronize an AD LDS instance with AD DS in Windows Server 2008.
However, you can create your own ILDF files and store them in %system root%\ADAM folder.
- Select the files that you want to import and click Next.
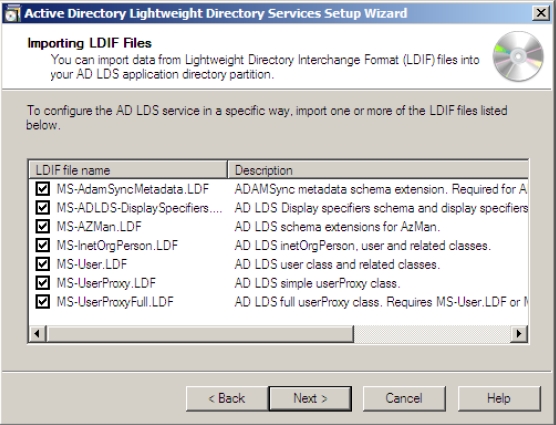
Figure 4-8 The Ready to install page appears. The page displays all the selections you made through wizard to create an AD LDS instance.
- Verify the selections you made and click Next.The Installing AD LDS page appears displaying the progress of AD LDS instance creation. The Completing the Active Directory Lightweight Directory Services page appears.
- Click Finish. The AD LDS instance is created and is ready to use.