The group policy has greatly improved in Windows Server 2008. It not only allows you to manage configuration of users and computers centrally in an Active Directory (AD) environment but also provide options for registry-based policy settings, security settings, software deployment, scripts, folder redirection, and preferences. Windows Server 2008 offers the built-in Group Policy Management Console (GPMC) version 2, which offers a new Starter Group Policy Object (GPO), which works as a template to create more group policy objects. Besides, the GPMC includes new templates, new import and export options, and a collection of administrative settings.
Create and Edit a GPO
To create a GPO, you need to:
- Click Start->Settings->Administrative Tools->Group Policy Management, as shown in Figure
- Expand the Forest, Domains, and then the domain node in which you want to create the GPO.
- Right-click the Group Policy Objects container and then select New from the menu that appears, as shown in Figure 5-8
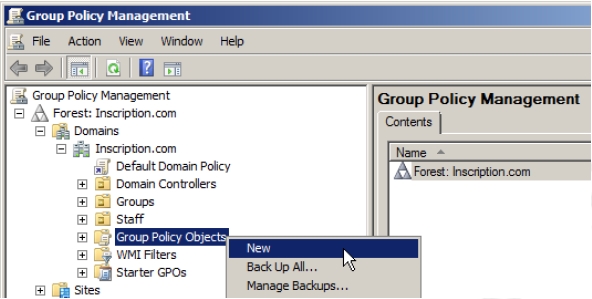
Figure 5-8 - Provide the name of the new GPO in the Name field of the New GPO window that appears, as shown in Figure 5-9.
- Click OK
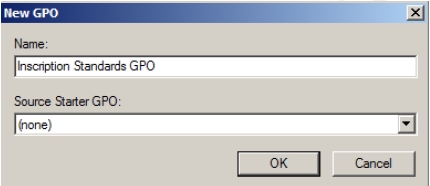
Figure 5-9 The GPO that you have created appears in the Group Policy Objects container, as shown in Figure 5-10. You can now edit the GPO.
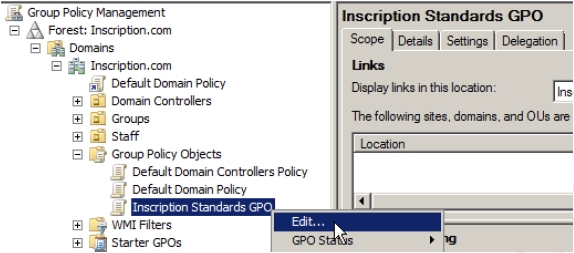
Figure 5-10 The group Policy Management Editor displays thousands of policy settings in an organized hierarchy within a GPO. The editor displays two sets of policies in containers, Computer Configuration and User Configuration, as shown in Figure 5-11.
Apply Group Policies
The computer configuration container contains policies that are applied to computers as soon as they start without considering the user who logs on to them. The user policies on the other hand are applied when a user logs on to a computer. These policies refresh in the background after the interval of every 90-120 minutes.
Both the Computer Configuration and User Configuration containers contain Preferences node, which is new in Windows Server 2008. This node contains more then 20 client side extension (CSE) that allows you to mange a number of additional settings that include MS Office related settings, registry settings, power option settings, mapped drives settings and much more. The preferences allow you to deploy files and folders, printers, scheduled tasks, and network connections. The Settings given under Preferences node allows you to enable or disable hardware devices.

The Policy node under the Computer Configuration and User Configuration containers contain thousands of policies divided into various heads such as Software settings, Windows Settings, and Administrative templates.
The Software settings allow you to manage Software Installation extensions that help you to specify how applications are installed and maintained within an organization. The Windows Settings node contains Scrips, Security Settings, and Policy-Based QoS nodes. The Scrips allow you to set Startup/Shutdown scripts in the Computer Configuration node and Logon and logoff scripts in the User Configuration node. The Security settings allow you to configure security using GPOs, the Policy Based QoS allows you to set network traffic related policies.
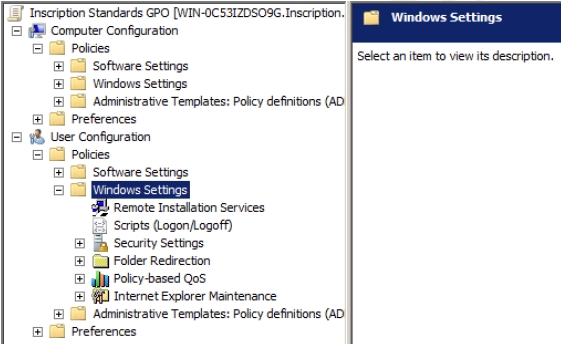
The Windows Settings node under the User Configuration contains settings for Remote Installation Services, Folder Redirection, and Internet Explorer Maintenance nodes, as shown in Figure 5-12:
Configure GPO Templates
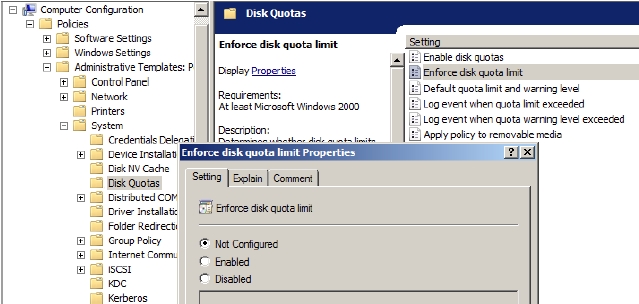
The Administrative Templates Node under the User Configuration and Computer Configuration containers contain thousands of registry based Group Policy settings. You can double-click on the policies appearing on the right panel to configure them. The dialog box for each policy setting contains an Explain tab that allows you to understand that policy. Each policy also contains a Setting tab that allows you to enable or disable that policy, as shown in Figure 5-13:
The administrative templates are the text files that specify the registry change. An administrative template is a pair of XML files, one with an .admx extension and the other with an .adml extension. The admx file specifies changes to be made to the registry and adml file provides language specific user interface in the GPME. The changes made to a single ADMX file affect the settings managed by that template.
Windows Server 2008 has introduced a Central Store, which resides in the SYSVOL folder and contains all the ADMX and ADML files. Once the central store is set up, the GPME loads all the administrative templates from the central store instead of from the local computer. These templates were previously been pulled in from the local workstation in earlier versions.
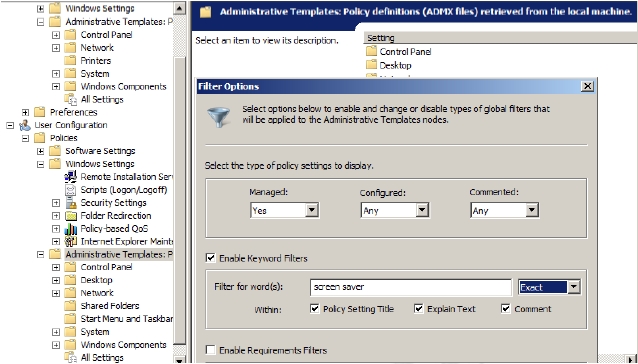
Another improvement in Windows Server 2008 Group policy is that it allows filtering of policies that allows you to search a specific policy.
To create filter, you need to:
- Right-click the Administrative Templates node and then select Filter Options from the menu that appears
- Select Enable Keyword Filters in the Filter Options dialog box that appears, as shown in Figure 5-14. This allows you to search the specific policy based on the keyword.
- Click OK.
The policies that contain the keyword screen saver will be displayed. After you find the desired setting you can configure that policy.